The Document panel allows you to change settings for the on screen virtual mat.
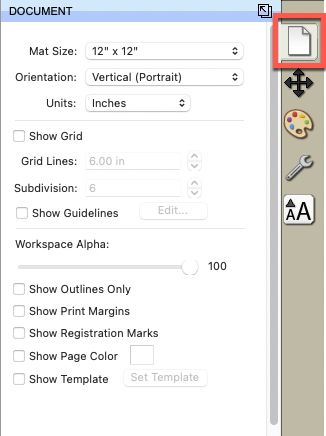
- Mat Size: Choose from a list of common pre defined sizes, or choose Custom to enter your own size.
- Orientation: Choose from Vertical (Portrait) or Horizontal (Landscape)
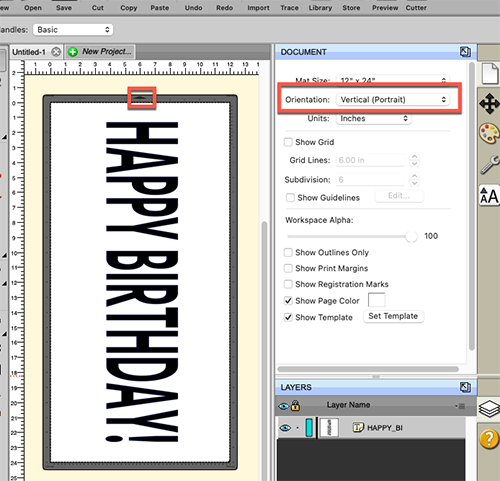
Below is an example where we have the Mat Size set to 12" x 24" with the Orientation set to Vertical (Portrait). Please note there is an arrow in the border of the mat indicating the top side.
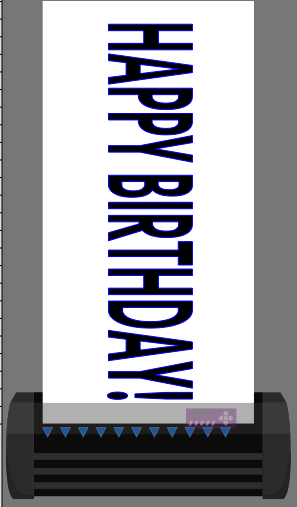
Here is how the layout will be relative to the cutting machine.
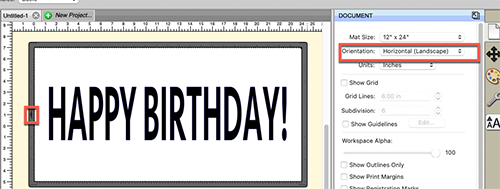
Below is the same 12" x 24" mat but with the Orientation set to Horizontal (Landscape).
Important to note that the mat size is still 12" x 24" and not 24" x 12". Even though visually on the screen it looks like it is 24" x 12", the actual mat is still 12" x 24" but just rotated to be shown as Landscape. You will see the arrow in the mat border on the left side now.
Here is how the layout will be relative to the cutting machine. This is cutting identical to the previous Vertical (Portrait) example. It is just the view is rotated to Landscape here.

- Units: Choose the unit of measurement (Inch, cm, mm) to use.
- Show Grid: Show a set of vertical and horizontal lines at the specified distance.
- Grid Lines: Distance between major grid lines.
- Subdivision: How many minor grid lines within the major grid lines.
- Show Guidelines: Enable to show and Edit your custom Guidelines. You can add a horizontal guideline by clicking in the top horizontal ruler and dragging downwards. To add a vertical guideline, click in the left vertical ruler and drag right.
- Workspace Alpha: Set the opacity to allow you to see through the design, where 100 is completely opaque and 0 is completely transparent. This is for design purposes and does not affect how the artwork will be exported/printed.
- Show Outlines Only: Show only the vector outlines for the design and nothing will be filled in.
- Show Print Margins: Show the print margins for the default Printer.
- Show Registration Marks: Show registration marks used for Print+Cut (Contour Cutting) if your cutting machine support this function.
- Show Page Color: Set a color to fill the background of the work area.
- Show Template: Set a background template for design purposes. Click Set Template to choose a template, such as a T-Shirt, Cup, Bowl, etc.


